Introduction
In many customer service or project management scenarios, accurately tracking the time spent on each ticket or task is essential for billing, reporting, and productivity insights.
This is where Timers come in.
Timers help you record the actual time you spend working on a ticket. Instead of manually tracking and logging your hours, you can start a timer when you begin working and stop it when you’re done. This makes time logging easy, ensures your recorded time is accurate, and reduces the chance of forgetting to log your work.
Timers can later be converted into either:
Service charges, used for billing or invoicing, or
Time entries, used for internal tracking, reporting, or audits.
Whether you’re working from your desktop or switching between devices, timers provide a simple, reliable way to capture your work time as you go.

What are timers?
A Timer is a personal time-tracking tool associated with a specific ticket. It records the amount of time you spend working on that ticket.
Each user in a ticket can start and manage their own timer independently, giving full flexibility to teams working collaboratively.
Here’s how timers work:
You can start a timer when you begin working on a ticket.
The timer will continue to run until it is stopped.
Timers also run in the background, i.e., even if you log out or close your browser tab or device, time will continue to accumulate until stopped. This ensures uninterrupted time tracking.
Once you’ve completed the work, you can convert the timer into a service charge (for billing purposes) or a time entry (for time tracking purposes).
Timers are especially useful when:
You work on multiple tickets throughout the day.
You want to ensure clients are billed for the exact time spent.
You want to minimize the effort of tracking time manually.
Timer actions
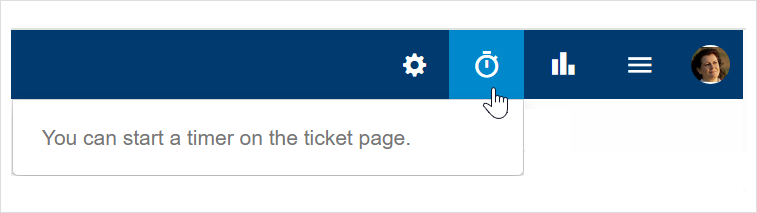
Starting a timer for a ticket
Open the ticket.
Click the Timer button in the toolbar.
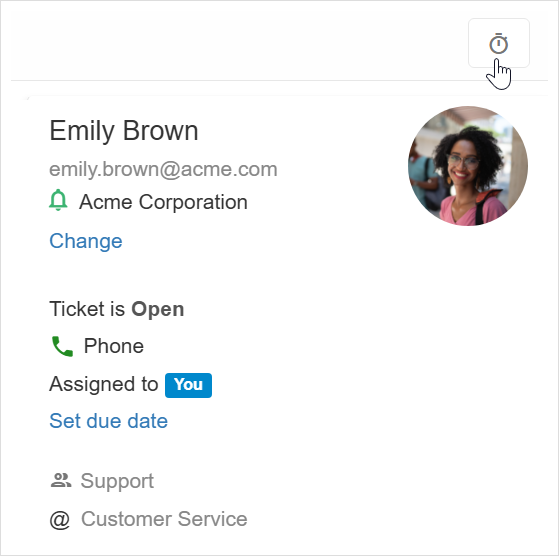
Once the timer is started, you can see it on the ticket sidebar.

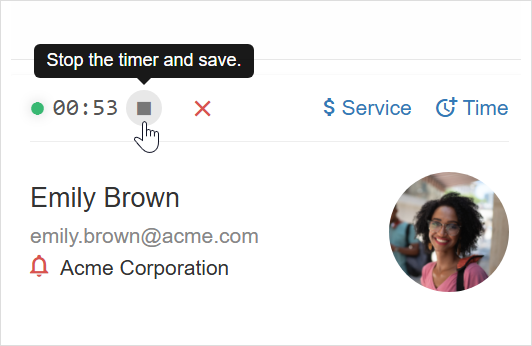
Stopping a timer
You can pause the timer, for example, if you switch to another task or take a break, by clicking the Stop button. (You can always start a stopped timer, see below).
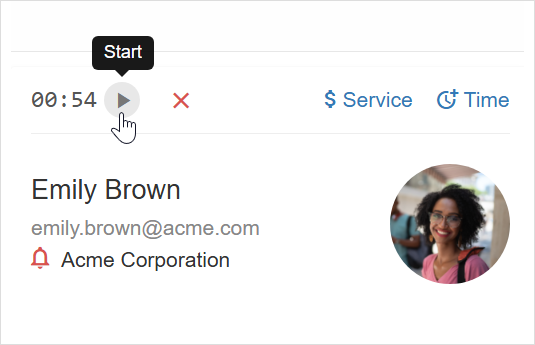
Start a stopped timer
You can start a stopped timer by clicking the Start button.
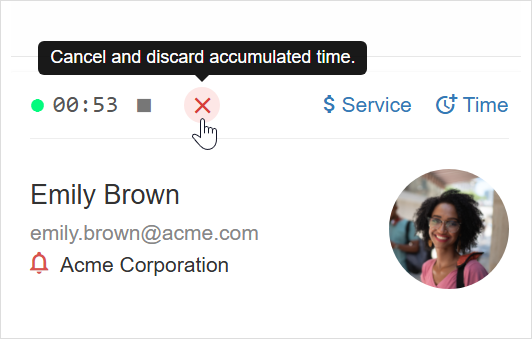
Canceling a timer
You can remove the timer without logging any of the time it accumulated by clicking the X button.
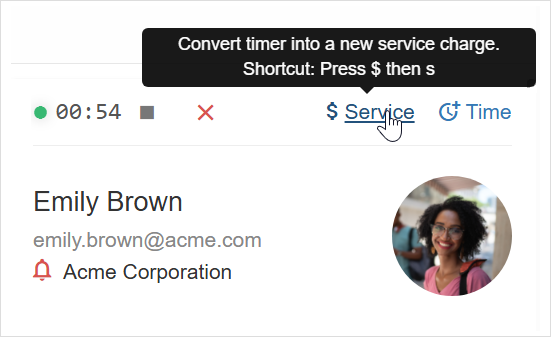
Converting a timer into a new service charge
You can convert a timer to a new service charge using the Service option.
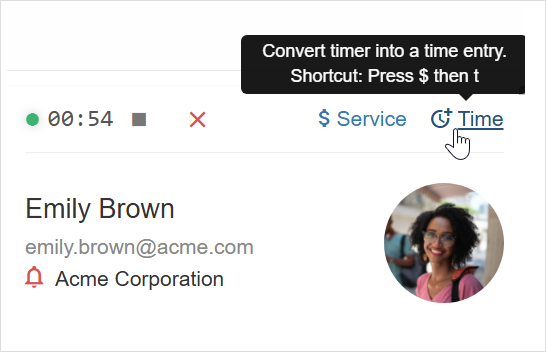
Converting a timer to a new time entry
You can convert a timer into a new time entry using the Time option.
Timers list
Working with the timers list
You may be working on multiple tickets at the same time or jumping between different tickets throughout the day. Timers support all such workflows and scenarios.
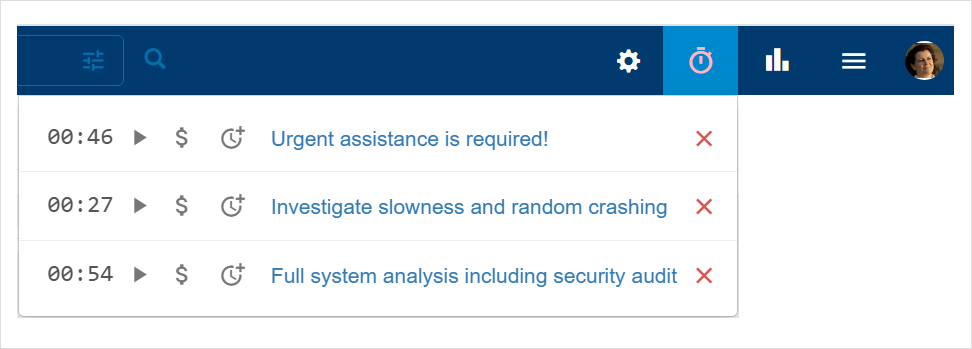
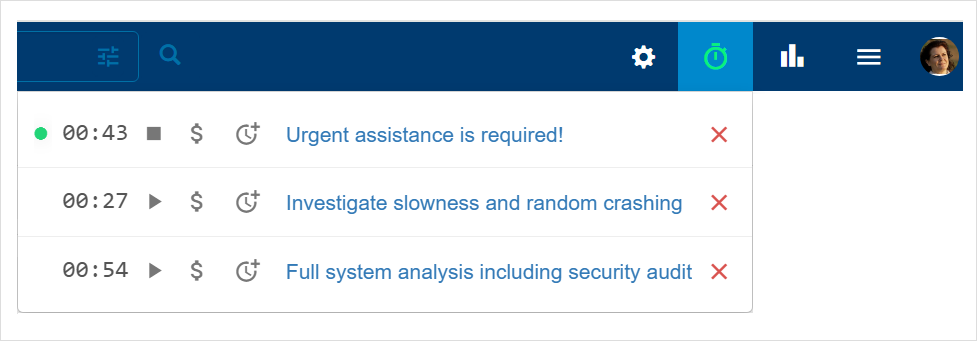
You can view a list of all your timers by clicking the Timer icon in the top-right corner.
The timers list will open and you’ll see all of the different timers you have and their state.

Directly from the list that shows you can:
Go to the ticket details page the timer is associated with.
Stop a running timer.
Start a stopped timer.
Cancel a timer.
Convert a timer into a service charge.
Convert a timer into a time entry.
Start a new timer (Available only inside the ticket details page).
Timers overall state
You can tell whether you have any timers and if so whether there’s a running timer even before opening the list of timers.
The Timer icon itself indicates the overall state of your timers:
White – You do not have any timers.
Green – At least one of your timers is running.
Red – You have one or more timers but they are all stopped.