This article discusses how to log charges and time entries.
What are charges?
Charges help you capture more billable time, log and bill for products sold, parts used, and services provided, as well as track time spent on different tasks — whether billable or not. You log charges for both customer billing and tracking purposes.
What are product charges?
Product charges are charges logged to record products sold to customers or parts used to resolve a problem.
What are service charges?
Service charges are charges logged to record services provided to customers. These services can be either time-based or fixed-price.
What are time entries?
Time entries are logged by users to track how work time is spent. While they are not intended for billing purposes, you can also log them as part of service charges for your convenience.
To view and log charges, a user must be granted access rights.
Charges in conversations
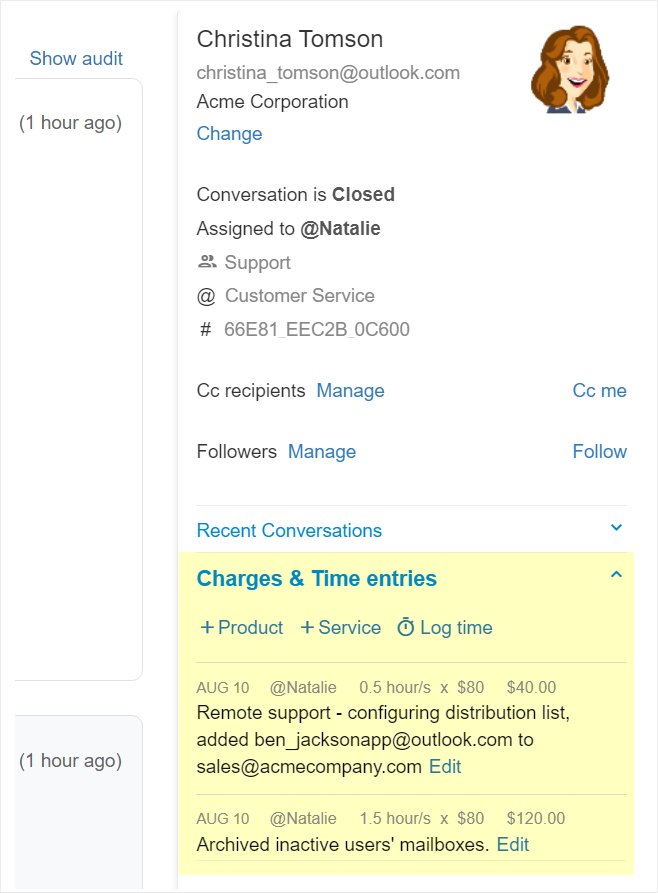
You can view all charges logged under a conversation and add additional charges and time entries using the Conversation Charges app, located in the conversation sidebar.
Adding charges directly from the conversation details page
To add charges using the Conversation Charges app:- Visit the conversation details page.
- Click Charges & Time Entries app on the sidebar to expand.
- Click the relevant option –
- Product to add a product charge.
- Service to add a service charge.
- Log Time to add a time entry.
Alternatively, add charges using keyboard shortcuts –
Press:
- $ then p to add a product change.
- $ then s to add a service charge.
- $ then t to add a time entry.
Working with the charges list
The charges list displays all the charges and time entries you have logged, from the most recent to the oldest.
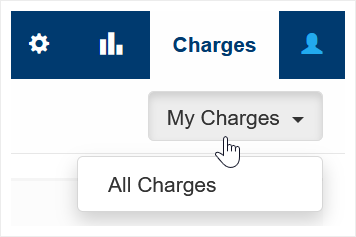
Administrators and users who handle business financials have ‘Full’ billing access rights and can view and manage charges for all other users. To manage other users’ charges, use the ‘My Charges’/’All Charges’ dropdown located in the top right corner to switch modes.
The Charges list shows the following information:
- Date – The date when the work was performed or the product was sold.
- Account – The customer.
- Product / Service – The specific product or service being charged.
- Quantity – or – Hours to Bill (for time-based charges).
- Hours worked – Shown when set, relevant for service charges and time entries.
For users managing financial details, additional information is displayed:
- Rate / Unit price
- Charge total
- Billable / Not Billable – A flag indicates whether the customer should be billed.
- Unbilled/Billed – Details on whether the charge has been billed.
Adding a new Product charge
- Click the Three-lined (‘Hamburger’) icon on the top-right corner and choose Charges & Time log.
- Click New Product Charge form the top-left corner.

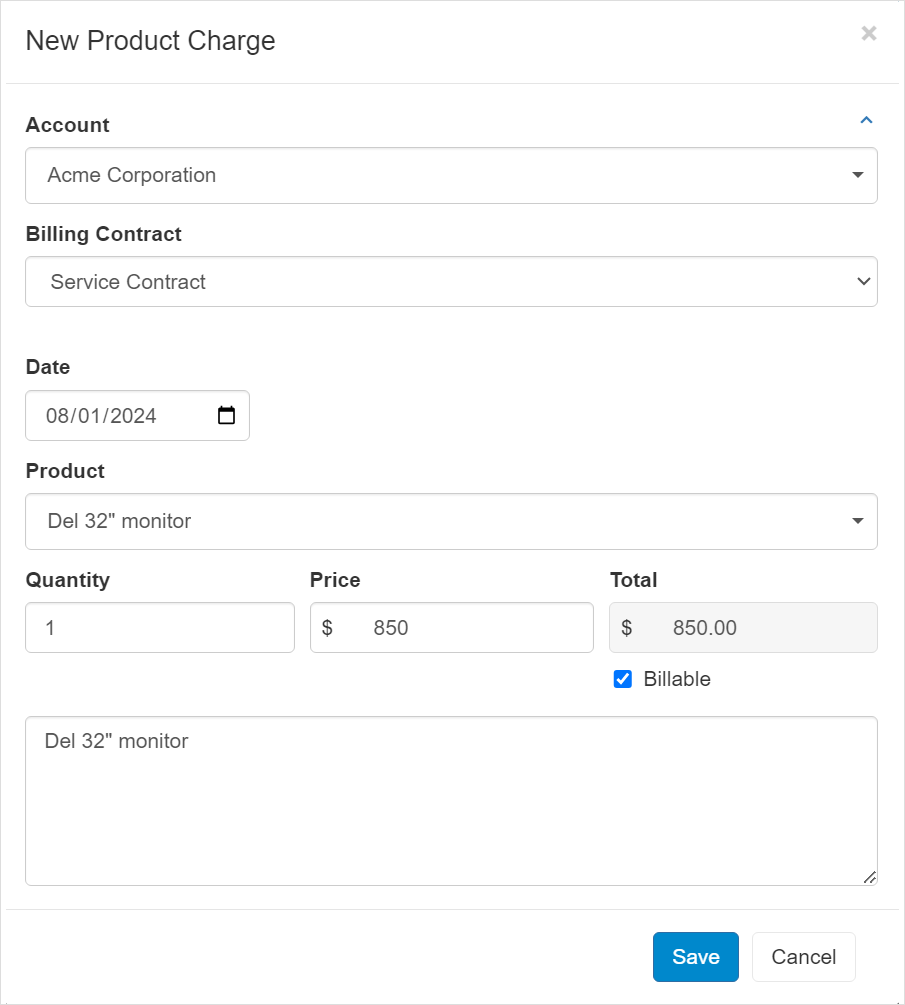
- Select the Account.
- Select the Billing Contract or keep the automatically selected Contract for Account/System default.
- Set the Date (default Today).
- Select the Product.
- Set the Quantity.
- Set the Price.
- Add Description.
- Click Save.
Adding a new Service charge
- Click the Three-lined (‘Hamburger’) icon on the top-right corner and choose Charges & Time log.
- Click New Service Charge form the top-left corner.
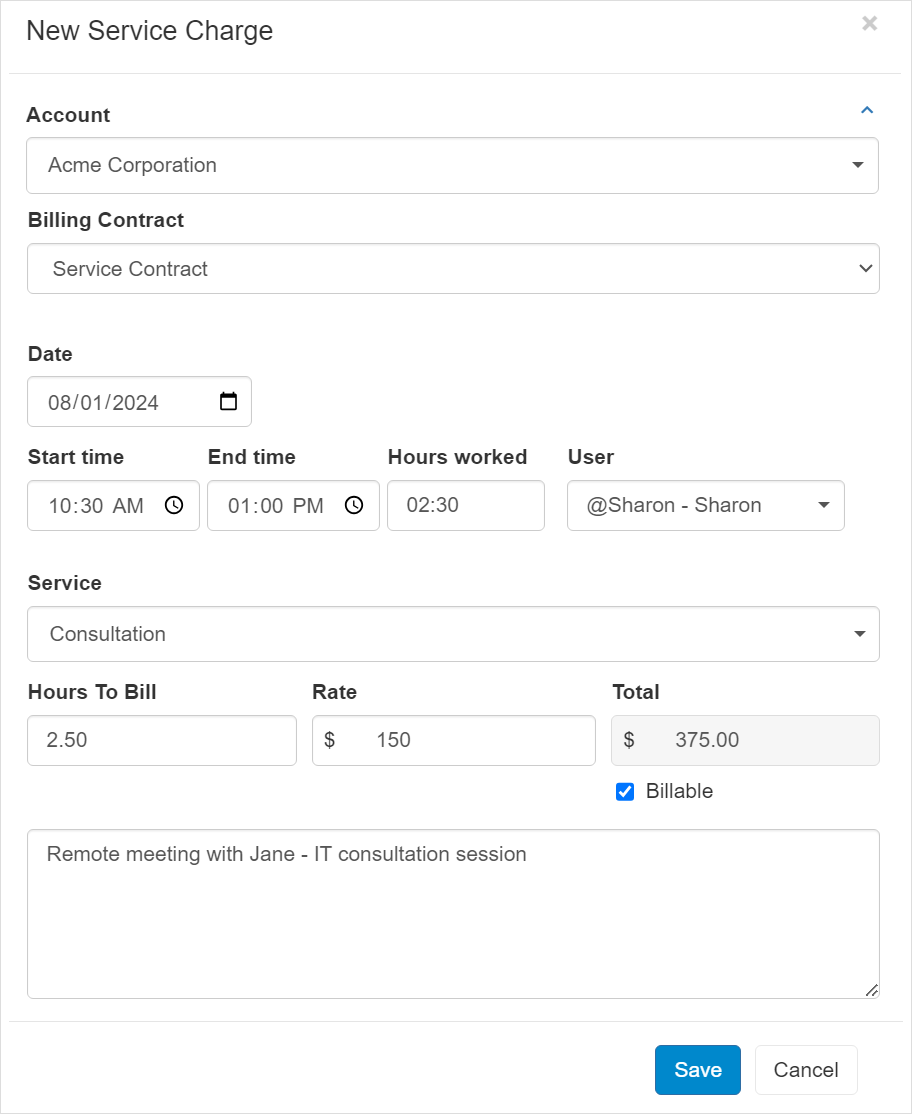
- Select the Account.
- Select the Billing Contract or keep the automatically selected Contract for Account/System default.
- Set the Date (default Today).
- Set Start and End Time or set Hours Worked (optionally).
- Select the Service.
- Set the Quantity/Hours to Bill.
- Set the Price/Rate.
- Add Description.
- Click Save.

Adding a new Time entry
- Click the Three-lined (‘Hamburger’) icon on the top-right corner and choose Charges & Time log.
- Click Log Time from the top-left corner.

- Select the Account (optionally).
- Set the Date (default Today).
- Set Start and End Time or set Hours Worked (optionally).
- Select the Service.
- Add Description.
- Click Save.
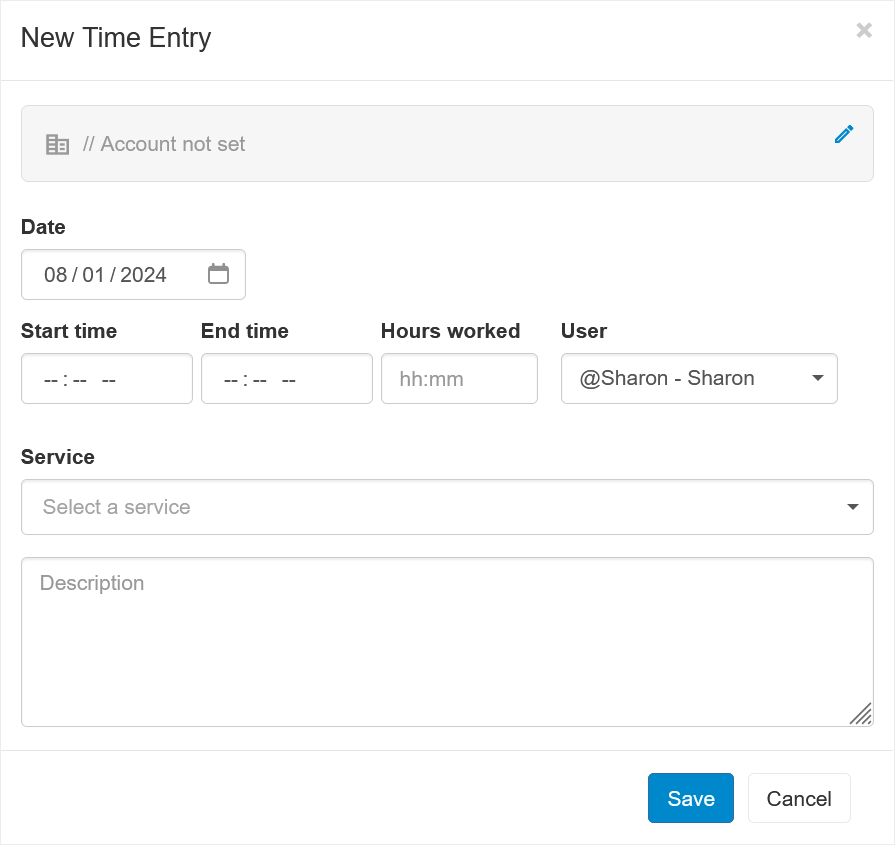
Logging and tracking hours worked
Actual hours worked represent the time spent providing the service. These may, but do not have to, correspond to the time duration for which the customer is billed (e.g., for time-based service charges).
When logging a service charge or time entry, the Date field defaults to today but can be adjusted if needed. Additionally, you can log the Start and End times to reflect when the actual work began and ended. Once the times are set, the Hours Worked field is automatically calculated. Alternatively, you can manually enter the number of hours and minutes worked directly into the Hours Worked field, leaving the Start and End times empty.
For time-based charges, the Hours to Bill field is automatically populated with the value from the Hours Worked field, but you can adjust it to any amount if needed.
Search for charges
- Click the Three-lined (‘Hamburger’) icon on the top-right corner and choose Charges & Time log.
- This will display the list of your user Charges.
- Press / or click the Search charge search box at the top.

- Enter the text you want to search by or choose from the recent searches popup list.
- Press Enter or click the magnifying glass to perform the search.
- You should now see only charges that match your search.
- To further refine the search, use the search options in the Search Box (see below).
Search options help you refine your search results:
- Click the Search options icon in the search box, or press s then o.
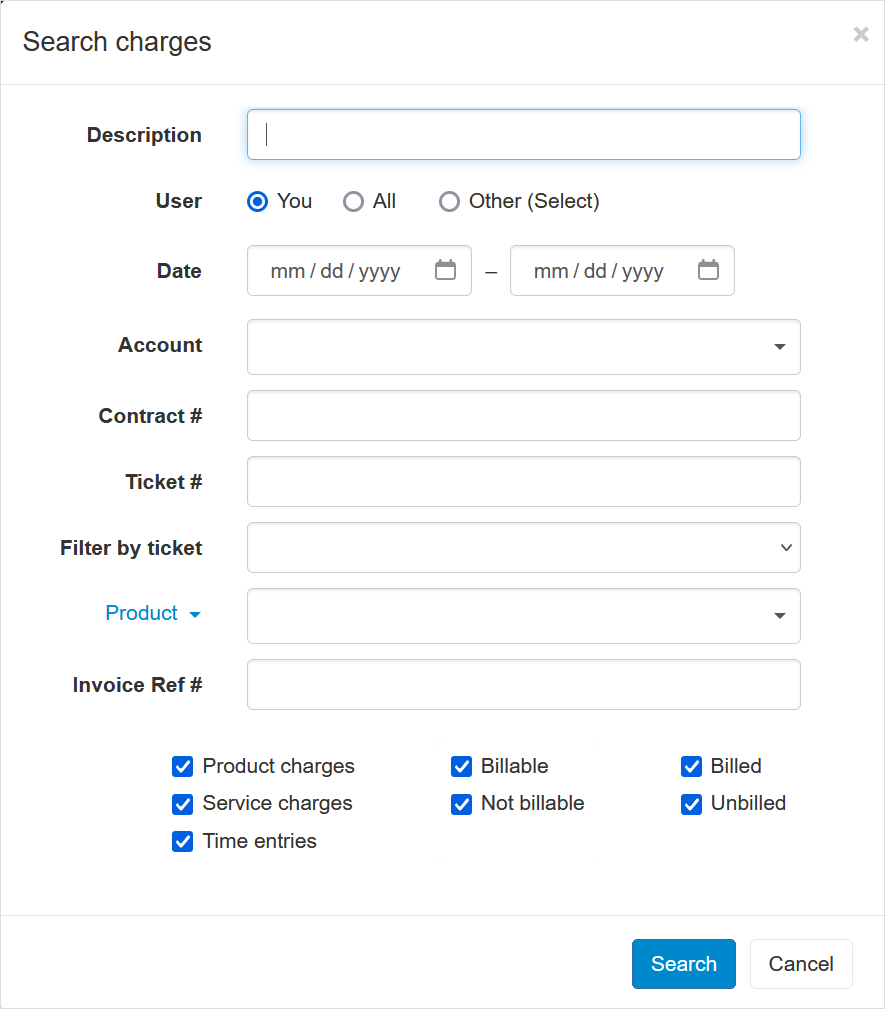
- Enter the search criteria you want to search by, using the search options:
- Description
- User
- Date
- Account
- Contract # – The unique, auto-generated ID of the contract is displayed on its details page.
- Conversation # – The unique, auto-generated ID of the conversation.
- Filter by conversations – Activate to exclude charges of open conversations.
- Product/Service
- Invoice Ref#
- Type – Filter to see product charges, service charges, or time entries.
- Billable flag
- Billed flag
- Click Search to perform the search.
Recent searches
When searching for charges, the search parameters are added to the Recent Searches so you can easily use them in the future. You can also Pin searches that you commonly use so that they will appear at the top of the list and not get deleted when you add new searches.
Pin a search:
- Click the search box in the toolbar or press the ‘/’ keyboard shortcut.
- Hover over the recent search you want to pin.
- Click the Pin icon that appears on the right.
- You should now see the search at the top of the list.
Unpin a search:
- Click the search box in the toolbar or press the ‘/’ keyboard shortcut.
- Hover over the recent search you want to unpin.
- Click the Pin icon that appears on the right (with the tooltip “Unpin”).
- You should now see the search at the bottom of the list.
Remove a search from the Recent Search list:
- Click the search box in the toolbar or press the ‘/’ keyboard shortcut.
- Hover over the recent search you want to pin.
- Click the X icon that appears on the right.
- The search is removed from the list.
Delete Charge
- Click the Three-lined (‘Hamburger’) icon on the top-right corner and choose Charges & Time log.
- Select the Charge you want to delete using the selection box on the left side of the charge.
- Click More > Delete, or press the # keyboard shortcut.