What are accounts?
Accounts in Replypad hold the organizations or the companies you service. Each account may have contacts linked to it, which are the people you interact with in this organization.The account can be associated with a domain, so email arriving from this domain will be automatically assigned to this account. This way tickets will be automatically associated with this account, even when arriving from a new email address, as long as it belongs to the customer’s domain.
Create new account
- To create an account you should be a workspace administrator or power user or standard and have Accounts & Contacts access rights.
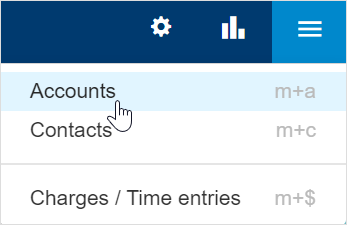
- Click the Three-lined (‘Hamburger’) icon on the top-right corner and choose Accounts.
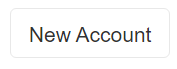
- Click New Account form the top-left corner.
- Enter the Account Name and click Save.
- The top line should now say the account was created successfully. Click Open to add more details.
- After creating the account, you can complete setting up account settings by clicking the account you want to edit.
Account popover
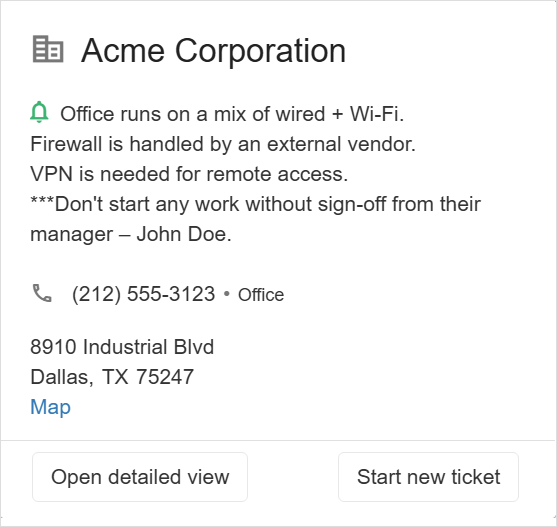
Wherever you have a link to an account, you can use the account popover to view account details and perform actions.
In the ticket window, hover over the account to open the popover window.
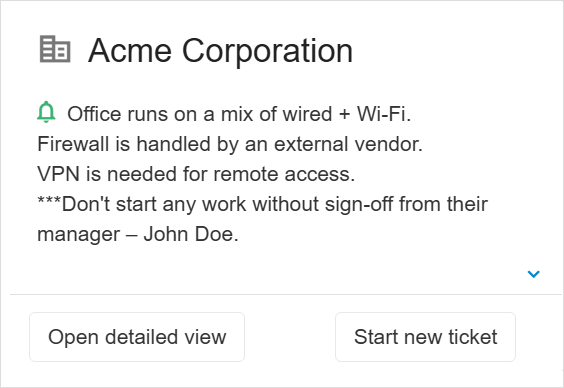
You can perform actions:
- Click Open detailed view to view or edit the account’s details.
- Click Start new ticket to start a ticket with this account.
- Click the arrow at the bottom to expand and view the account’s phone numbers and address.
View accounts list
- To view your accounts, you should have Accounts & Contacts access rights.
- Click the Three-lined (‘Hamburger’) icon on the top-right corner and choose Accounts.
- This will display the complete accounts list.
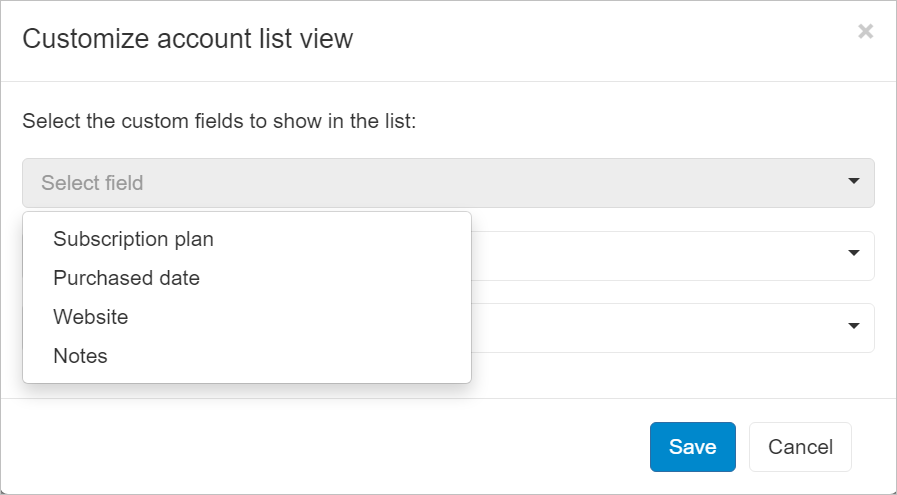
Customize accounts list
Customizing the accounts list lets you choose which custom fields to display in the list view.
- Click the More button on the toolbar and choose Customize list view.
- Select the custom fields you want to display in the list view. You can choose up to 3 custom fields.
- Click Save to save your changes.
Account settings
To view and edit the account settings:
- Click the Three-lined (‘Hamburger’) icon on the top-right corner and choose Accounts.
- This will display the complete accounts list.
- Click the account you want to view or edit.
- Follow the instructions for editing account settings.
Search for accounts
- To find an account you should have Accounts & Contacts access rights.
- Click the Three-lined (‘Hamburger’) icon on the top-right corner and choose Accounts.
- This will display the complete accounts list.
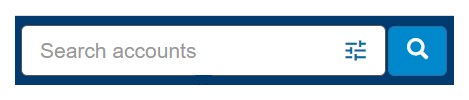
- Press / or click the Search accounts search box at the top.
- Enter the text you want to search by or choose from the recent searches popup list.
- Press Enter or click the magnifying glass to perform the search.
- You should now see only accounts that match your search.
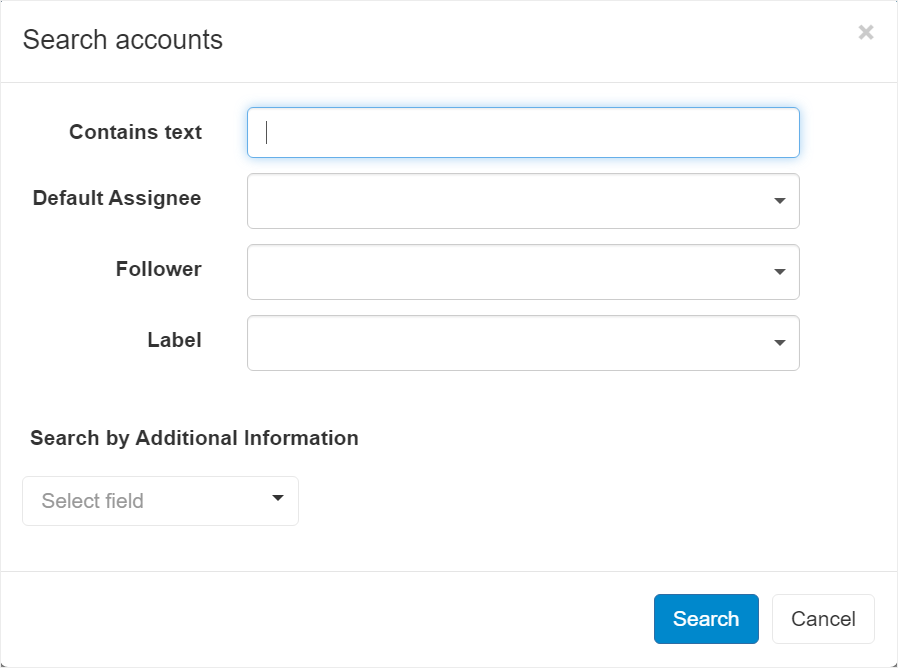
- To further refine the search, use the search options in the Search Box (see below).
Search options help you refine your search results:
- Click the Search options icon in the search box, or press s then o.
- Enter the search criteria you want to search by, using the search options:
- Default Assignee – The user that is assigned to tickets of this account, by default.
- Follower – Find accounts this user is following.
- Label – Find accounts with this default label.
- Additional fields – If you have custom fields defined for Accounts, where you keep additional information about each account, you can search by these fields. Learn more about Managing Custom Fields.
 Search options are also available when using the app on your mobile device, so you can easily find the accounts you need when on the go.
Recent searches
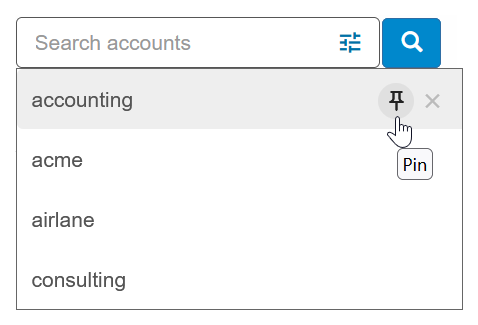
When searching for accounts, the search parameters are added to the Recent Searches so you can easily use them in the future. You can also Pin searches that you commonly use so that they will appear at the top of the list and not get deleted when you add new searches.
Pin a search:
- Click the search box in the toolbar or press the ‘/’ keyboard shortcut.
- Hover over the recent search you want to pin.
- Click the Pin icon that appears on the right.
- You should now see the search at the top of the list.
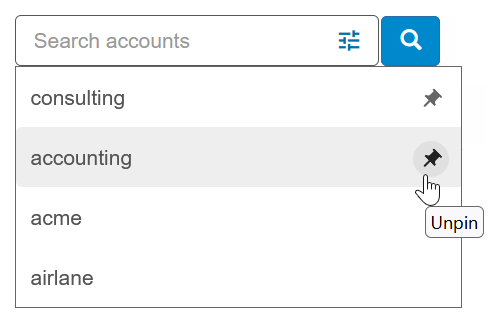
Unpin a search:
- Click the search box in the toolbar or press the ‘/’ keyboard shortcut.
- Hover over the recent search you want to unpin.
- Click the Pin icon that appears on the right (with the tooltip “Unpin”).
- You should now see the search at the bottom of the list.
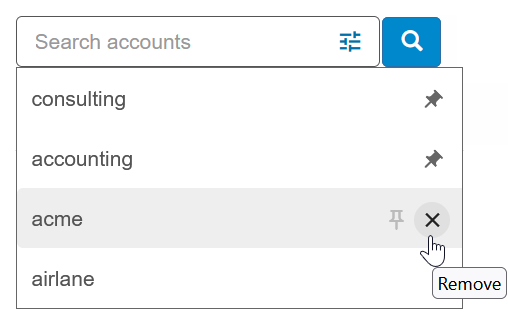
Remove a search from the recent search list:
- Click the search box in the toolbar or press the ‘/’ keyboard shortcut.
- Hover over the recent search you want to pin.
- Click the X icon that appears on the right.
- The search is removed from the list.
- Click New Account form the top-left corner.