Manage mailboxes
Mailboxes in Replypad enable email communication to and from a workspace. An administrator usually creates the mailbox when creating the workspace. By managing mailboxes you can view and edit their settings, set the default mailbox, send test emails to the mailbox, and more.View workspace mailboxes
- To view your mailboxes you need to be an administrator.
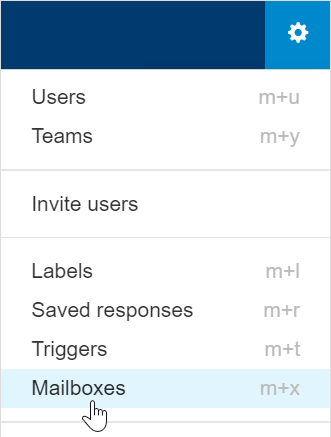
- Click the gear icon in the upper-right corner, and from the dropdown menu select Mailboxes . Another way to access mailboxes is to click the workspace name in the top toolbar and select Manage workspaces. Then from the workspace click the gear icon and select Mailboxes.
- This will display the mailboxes defined for this workspace.
- From this page you can create a new mailbox, delete a mailbox, edit the settings of an existing mailbox, set the default mailbox for this workspace, edit the mailbox signature, send test email and show message forwarding details. All actions are explained below.
Create new mailbox
Creating a new mailbox is usually part of the getting started workspace creation steps. However, you may want to add more mailboxes after a while, and you should follow the same procedure as explained in the Set up your mailbox guide.Edit mailbox settings
To edit the mailbox settings, such as name, default team, personalized replies, and more, see Mailbox settings.Edit mailbox signature
The signature is a part that is added automatically to outgoing public replies users post in a ticket. You can edit the mailbox part of the signature. See Mailbox signature for more instructions.Set default mailbox
The default mailbox will be used by default for new tickets. Users can change the ticket’s mailbox from the ticket details.To change the default mailbox:
- In order to setup the default mailbox you need to be a workspace administrator.
- Click on the gear icon in the upper-right corner, and select Mailboxes from the dropdown menu.
- Click the Gear icon in the mailbox you want to update, and select Set as default.
- You should now see the ‘Default’ indication in the mailbox area.
Send test email to mailbox
The test email helps you make sure that your mail server copies your emails to your Replypad mailbox.
To send a test email, follow these steps:
- In order to send a test email you need to be a workspace administrator.
- Click on the gear icon in the upper-right corner, and from the dropdown menu select Mailboxes.
- Click the Gear icon of the mailbox you want to test, and select Send test email.
- In the window that opens, click Send test email.
- Click the Team Inbox to view all newly arriving email messages.
- You should see the test email message in the Team Inbox and in the Unassigned view a few moments after sending the test email.
- Gmail: If the email does not arrive, visit your gmail setting again and in the Forwarding and POP/IMAP settings verify that forward is enabled. Make sure to click the Save Changes button at the bottom of the page to save your changes when you’re done.
- You can manually send a test email, to test the mailbox forwarding:
- Open your personal email client.
- Send an email message to the address assigned to the mailbox. This is the email address you defined for your mailbox. You can find it in Replypad in the Mailboxes settings.
- Open Replypad and click the Team Inbox to view all newly arriving email messages.
- You should see your email message in the Team Inbox and in the Unassigned view.
Show message forwarding details
Shows the forwarding settings you should use in your mail server in order for emails to be forwarded to the Replypad mailbox.From here you can copy the unique identifier to the clipboard in order to configure the auto-forwarding rule in your external inbox.
If you haven’t completed the initial mailbox forwarding settings yet, click for relevant instructions: Auto-forwarding from G Suite (Gmail), or Auto-forwarding from Microsoft 365
Domain verification (optional) – advanced
Email messages sent by Replypad to your customers are sent from one of your public email addresses, i.e. from your domain. In order to better preserve your branding and ensure that emails get delivered properly you can authorize Replypad to send from these addresses.
Authorizing Replypad to send emails from your domain requires a verification process. This process involves making changes to your domain’s DNS settings and although it is short, it does involve technical steps.
While domain verification is optional and emails will still be delivered without it, it is recommended to consider performing the verification process if you have knowledge about DNS settings.
To verify your DNS: You should be a workspace administrator.
- Click the Gear icon and select Mailboxes.
- Click the Advanced link at the bottom-right corner of the window.
- Click Proceed in the message window that appears .
- Click Add domain and follow the steps as explained.