What are contacts in Replypad?
Contacts (or end-users ), are also sometimes referred to as customers. These are the people that you service, that send you emails and create tickets. Contacts may log into Replypad and access their tickets in your workspace, however, they do not have access to other features or data in your workspace. They can only submit and track tickets, and communicate with users (team members) using public replies. Contacts may optionally be linked to an organization or a company, known as Accounts in Replypad.
View contacts list
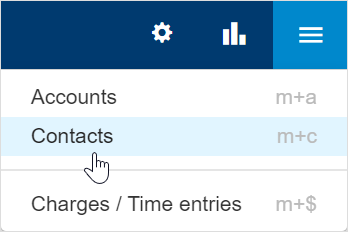
To view your contacts, you should have Accounts & Contacts access rights.- Click the Three-lined (‘Hamburger’) icon on the top-right corner and choose Contacts.
- This will display the complete contacts list.
Customize contacts list
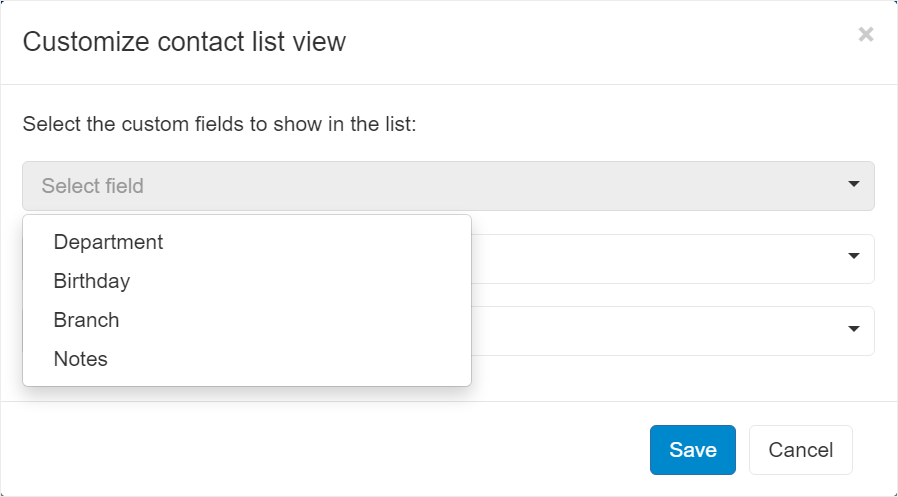
Customizing the contacts list lets you choose which custom fields to display in the list view.
- Click the More button on the toolbar and choose Customize list view.
- Select the custom fields you want to display in the list view. You can choose up to 3 custom fields.
- Click Save to save your changes.
Edit contact details from the list
To edit contact details you need to be a workspace administrator or Power user or Standard and have Accounts & Contacts access rights.
- Click the Three-lined (‘Hamburger’) icon on the top-right corner and choose Contacts.
- This will display the complete contacts list.
- Click the contact to edit its details.
Contact popover
Wherever you have a link to a contact, you can use the contact popover to perform actions:
In the ticket window, hover over the contact to open the popover window.
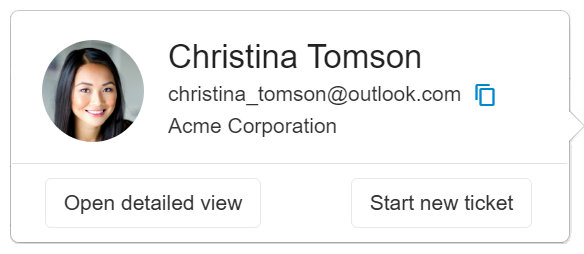
You can perform actions:
- Copy email address: Either mark the email address and copy or use the Copy link that appears when you hover over the email address.
- Click Open detailed view to view or edit the contact’s details.
- Click Start new ticket to start a ticket with this contact.
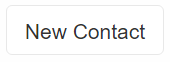
New contact
There are four main ways to create a new contact.- Using the New Contact button when viewing the contacts list (see below).
- By typing an email address that does not exist in the workspace, in the To/CC field of a ticket.
- Automatically by Replypad, the Sender and other Recipients of an incoming email automatically become contacts in Replypad if they do not exist in the workspace. See Incoming email to tickets.
- Using Import Contacts from the More menu in the contacts list.
Create new contact
- Click the Three-lined (‘Hamburger’) icon on the top-right corner and choose Contacts.
- Click New Contact form the top-left corner.
- In the window that opens enter the First and Last names. And the email address of this customer.
- Click Save.
- You can now edit the contact settings to add more details.
How are contacts created from email address?
Whenever you use an email address in the To/Cc fields, that you haven’t used before in a ticket, Replypad automatically creates a contact for this email. You can edit the contact at any time and complete the details.- Click the blue New Ticket button from the top toolbar.
- In the window that opens, enter the email address of the person you want to send this ticket to. If this email address does not exist in the workspace, it will automatically create a new contact for it.

- Click the Three-lined (‘Hamburger’) icon on the top-right corner, and choose Contacts.
- You should now see the new email you have just used listed as a new contact. Click the line to edit the contact’s settings. Add a name, link to an account, etc.
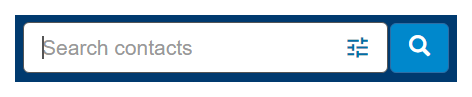
Search for contacts
Contacts can be linked to Accounts, account is the organization this contact belongs to, usually your customer’s company.
You can use the Search option to easily filter the list to show the contacts that belong to a certain account, or search by the contact name or other criteria:
- Click the Three-lined (‘Hamburger’) icon on the top-right corner and choose Contacts.
- This will display the complete contacts list.
- Click the Search box at the top.
- Enter the text you want to search by or choose from the recent searches popup list.
- You can also use the search options (see below) to refine your search further or to select the account from a list.
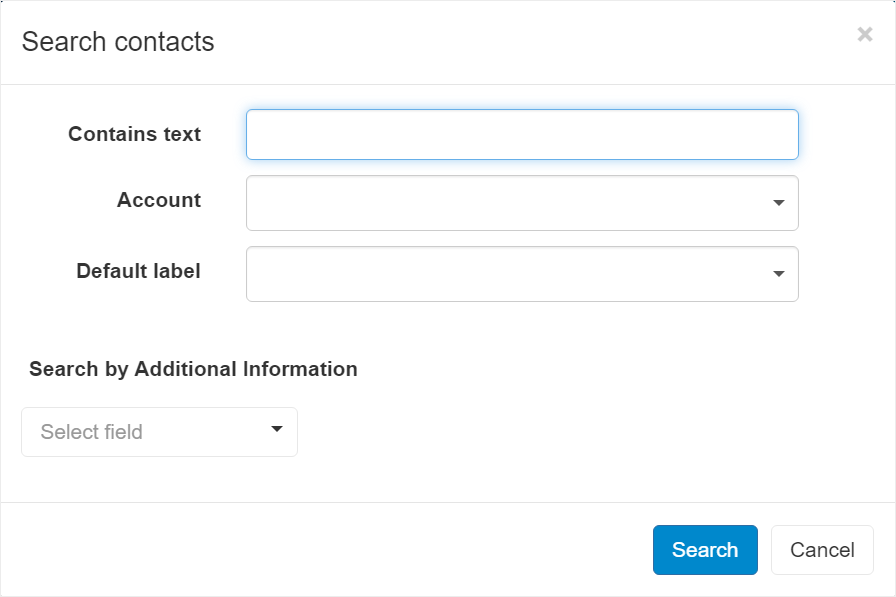
Search options help you refine your search results:
- Click the Search options icon in the search box, or press s then o.
- Enter the search criteria you want to search by, using the search options:
- Account – The account this contact is linked to.
- Default Label – Find contacts with this default label.
- Additional fields – If you have custom fields defined for Contacts, where you keep additional information about each contact, you can search by these fields. Learn more about Managing Custom Fields.
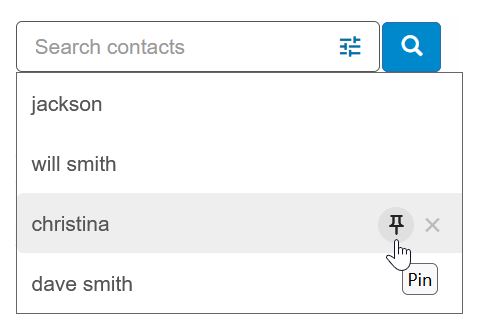
Recent searches
When searching for contacts, the search parameters are added to the Recent Searches so you can easily use them in the future. You can also Pin searches that you commonly use so that they will appear at the top of the list and not get deleted when you add new searches.
Pin a search:
- Click the search box in the toolbar or press the ‘/’ keyboard shortcut.
- Hover over the recent search you want to pin.
- Click the Pin icon that appears on the right.
- You should now see the search at the top of the list.
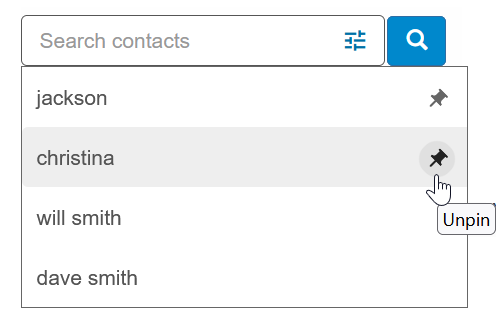
Unpin a search:
- Click the search box in the toolbar or press the ‘/’ keyboard shortcut.
- Hover over the recent search you want to unpin.
- Click the Pin icon that appears on the right (with the tooltip “Unpin”).
- You should now see the search at the bottom of the list.
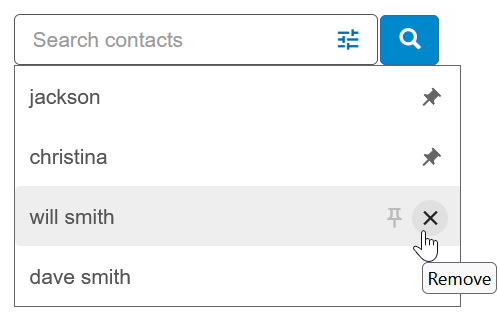
Remove a search from the recent search list:
- Click the search box in the toolbar or press the ‘/’ keyboard shortcut.
- Hover over the recent search you want to pin.
- Click the X icon that appears on the right.
- The search is removed from the list.