What are triggers?
Triggers are a set of user defined rule (triggers) that are checked and executed when an Event occurs. Each Trigger has a condition and actions. When the condition is met – the actions are executed.Triggers are managed only by workspace administrators from a dedicate page.
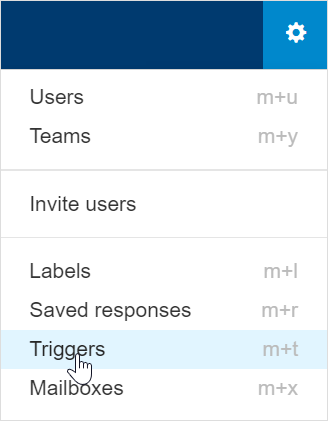
To open the triggers go to the gear icon in the top-right corner and select Triggers.
This page explains how to create, edit, change triggers order and activate triggers. If you are new to triggers, we recommend on reading Understanding triggers first.
Usage examples
- Set default Team to “Support” for email messages sent to ‘support@123computer.com’.
- Assign to ‘Dan’ for tickets sent to mailbox: Billing@123computer.com.
- Set Label “VIP” when a ticket arrived from a specific Account.
- Add Follower ‘Larry’ if Subject contains “Urgent”
Create new trigger
Creating a trigger consists of these steps:Step 1: Create trigger
- To create a trigger you need to be a workspace administrator.
- Use the gear icon in the top-right corner and select Triggers.
- Click New Trigger button
- Enter the name for the trigger. Make sure the name is specific and describes its essence, like “Set new tickets for sales with Sales Department Team”.
- Choose the event that will activate this trigger. Events can be ticket creation events, ticket update events and catch-all events.
- Click Save to create the trigger.
- Now, it’s time to create the conditions to be tested and the action that should be performed – see step by step instructions below.
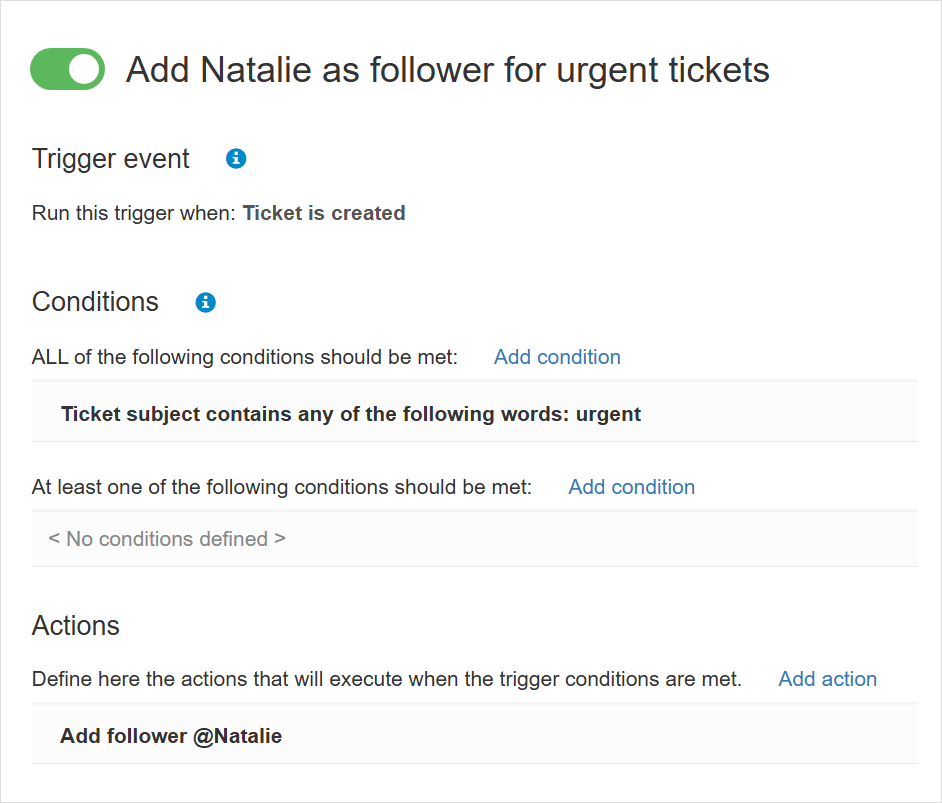
Step 2: Add trigger condition
The condition defines what has to happen in order for the action to execute. Which fields should have which values.Conditions can be defined to be executed in two ways:
- ALL of the following conditions should be met (the equivalent of AND operation).
- At least one of the following conditions should be met (the equivalent of OR operation).
- Choose whether you want to use the “All” or “At least” condition, and click Add condition.
- Set the condition Field which can be one of the following types:
- Ticket data fields – such as account, assignee, subject, etc.
- Initial message fields – field from the first message that was sent for this ticket
- Newest message fields – fields from the newest message for this ticket, meaning the current message that is being processed by this condition.
- Mailbox – the email address that is being used to send and receive messages for this ticket
- Set the operator and the value that will be tested against the field value in realtime. The operator depends on the type of field that is selected. Possible types are:
- Text – allows you to search an exact text or find word/s in the field
- Select value – allows you to select from the list.
- After setting all the parameters, click Save to save the condition. You should now see the condition under the Conditions area.
- You can now go on and create additional conditions if needed, or move on and add Actions.

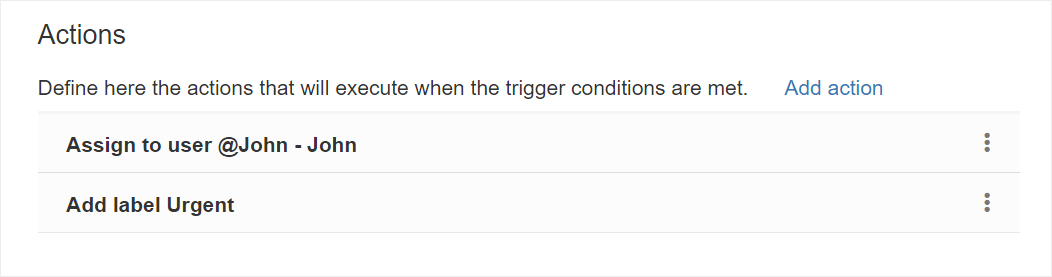
Step 3: Add trigger actions
Action is the actual changes that need to be performed when the condition is met. Each action changes data or adds data to the ticket, according to the value you provide in the action parameters.To add an action:
- Click Add action.
- Select the action which can be one of the actions listed below.
- Set the Value that will be applied in the action.
- After setting all the parameters, click Save to save the action. You should now see the action under the Actions list.
- You can now go on and create additional actions if needed, or finish creating the trigger and go back to the list.
- Add Cc recipient – Add a recipient to this ticket. Value must be selected from your users and contacts list.
- Add follower – add a user as a follower for this ticket. Value must be selected from your users list.
- Add label – Add a label to this ticket. Value must be selected from your Labels list.
- Assign to user – Assign the ticket to the user you select from the list.
- Manage priority – Set the ticket as priority or non-priority.
- Manage status – Set ticket status as open or closed.
- Post internal note – Add an internal note to the ticket, using the text you enter or using a saved response. The user that posted the note will show a “Replypad Trigger” user.
- Post public reply – Add an public reply to the ticket, using the text you enter or using a saved response. The user posting the reply will show a “Replypad Trigger” user, and a signature will be added if defined.
- Set team – Set a team to the ticket. Value must be selected from the list.
- Set mailbox – Set mailbox address to the ticket. This will change the email address that is being used when sending messages for this ticket.
Edit trigger
- To edit a trigger you need to be a workspace administrator.
- Use the gear icon in the top-right corner and select Triggers.
- Click the trigger you want to edit.
- If you want to edit the name, hover over the current name and click Edit on the right. Make sure the name is specific and describes its essence, like “Set new tickets for sales with Sales Department Team”.
- If you want to add additional conditions or actions, click Add condition or Add action.
- To edit a condition, click the condition line to edit the condition details.
- If you want to delete the condition, click the three dots on the right of the condition line, and select Delete.
- To edit an action, click the action line to edit the action details.
- If you want to delete the action, click the three dots on the right of the action line, and select Delete.
- Click Back when you are done to go back to the list.
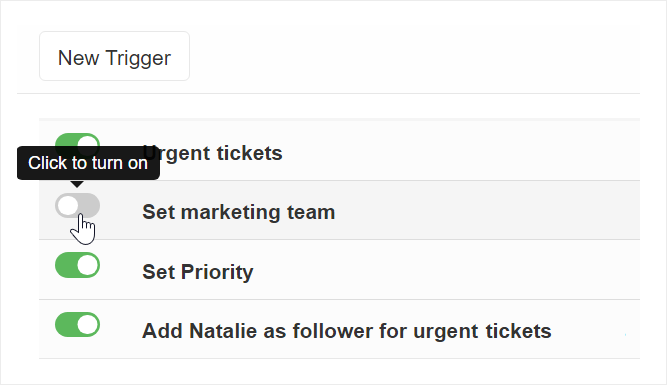
Pause and activate a trigger
- To pause and activate triggers you need to be a workspace administrator.
- Use the gear icon in the top-right corner and select Triggers.
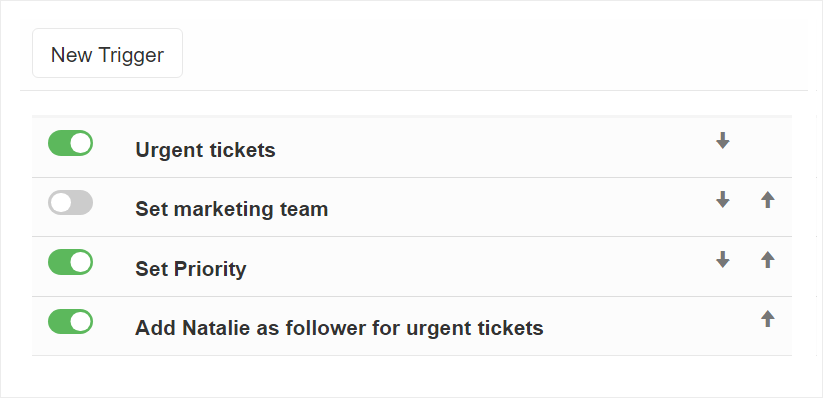
- Click the green toggle to turn the trigger Off/On.
- Click Back when you are done to go back to the list.
Change trigger order (up/down)
- To change triggers order, you need to be a workspace administrator.
- Use the gear icon in the top-right corner and select Triggers.
- Click the arrows on the right of the trigger line to move it up/down in the list
- Click Back when you are done to go back to the list.
The order of the triggers matters! See below how triggers work to understand the importance of the order of the rules.