Overview
In some cases, tickets need to be scheduled in a calendar – for example, when dispatching a technician for an on-site customer visit, or when arranging a remote session related to the tickets. The ticket dispatch workflow streamlines this process by making it easy to list tickets pending dispatch and scheduling in a calendar.
Any ticket can be added to the calendar instantly or marked for dispatch. Marking it for dispatch adds it to the list of tickets pending scheduling, making it easy for you or a dispatcher to see what needs to be scheduled and add it to the appropriate calendar – Microsoft 365 (Outlook) or Google Calendar.
To add a ticket to the calendar, use the Add to Calendar option. To mark a ticket for dispatch, so it appears in the list of pending dispatches, use the Mark for Dispatch option. To view all tickets pending dispatch, go to the For Dispatch view.
When a ticket is added to the calendar, the event includes details from your Replypad workspace and a link back to the ticket, making it easy to jump from Microsoft 365 or Google Calendar back to the ticket in Replypad.
Mark a ticket for dispatch
When you mark a ticket for dispatch, it appears in the For Dispatch view, where you can easily find and schedule it, or any other pending ticket, in Microsoft 365 or Google Calendar.
To mark a ticket for dispatch:
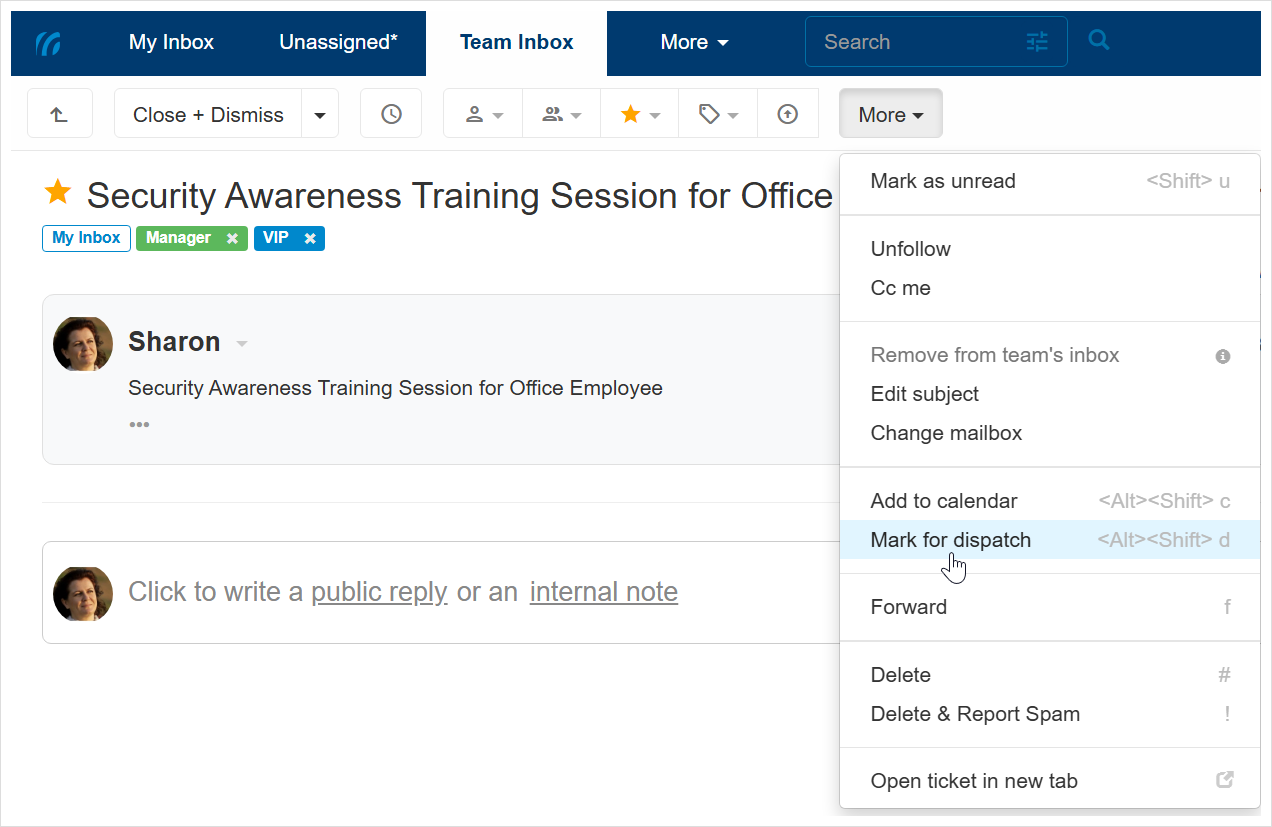
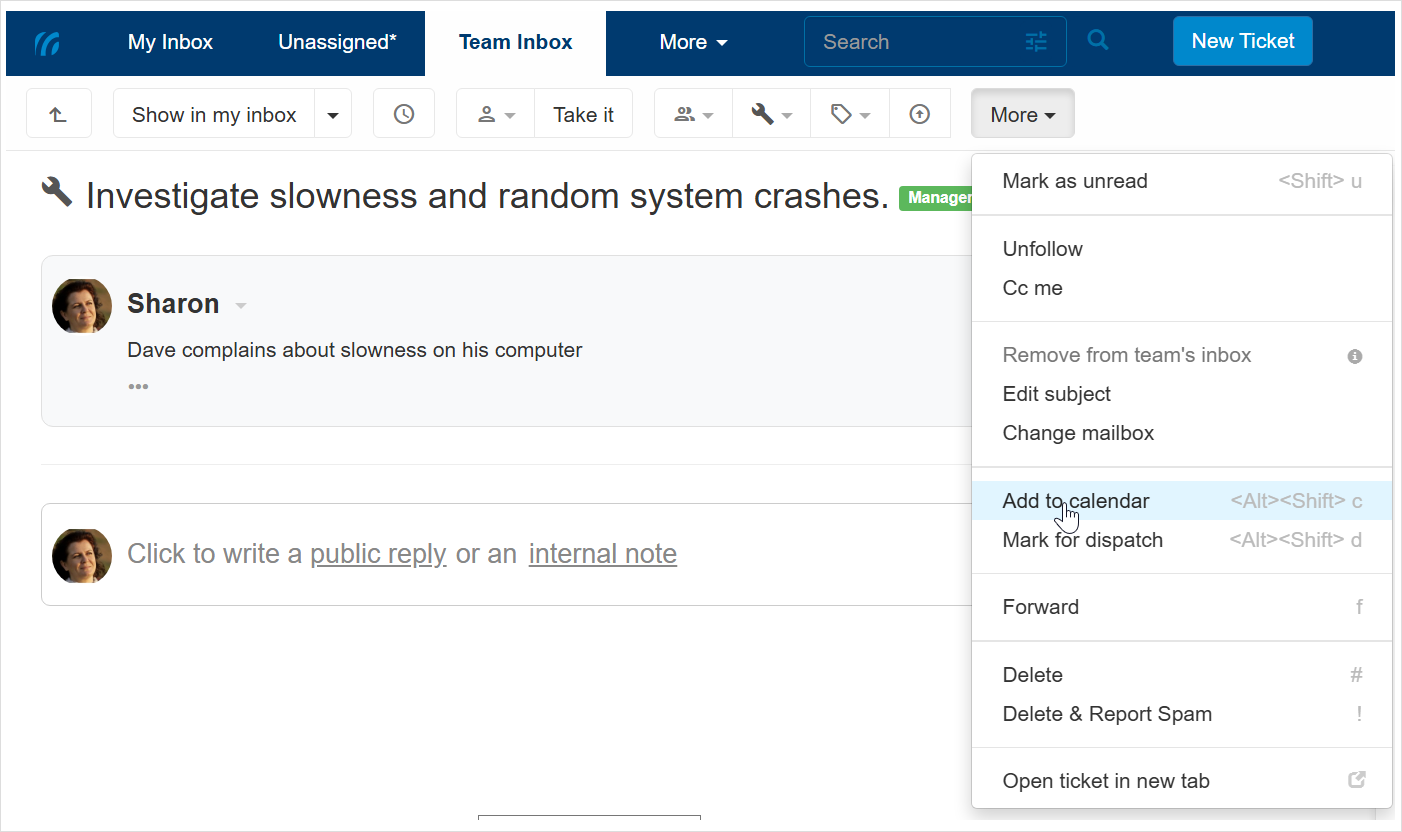
Visit the relevant ticket details page, open the More menu and select Mark for dispatch.
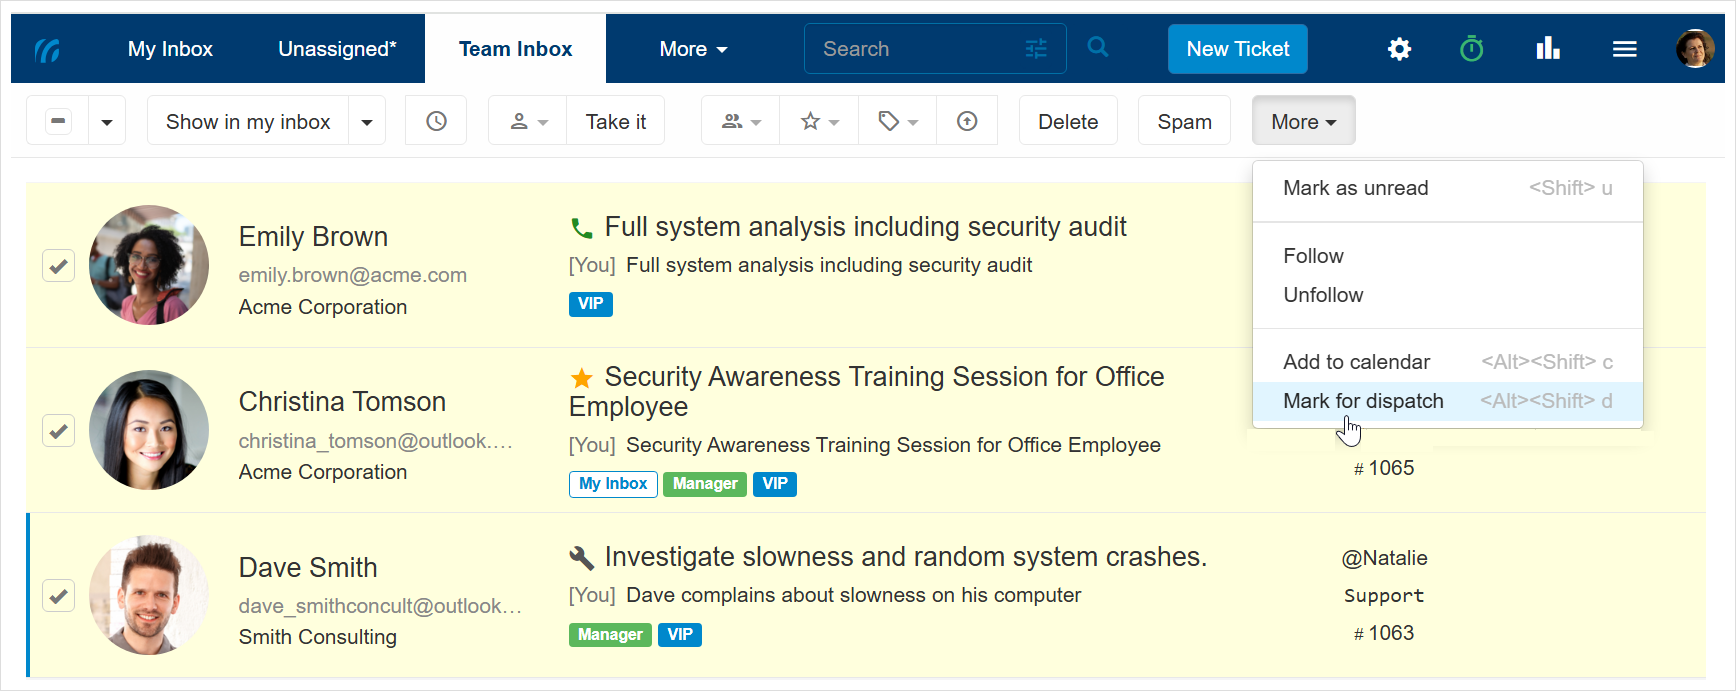
Or, from any ticket list view, select the ticket using the checkbox on the left, open the More menu and select Mark for dispatch.
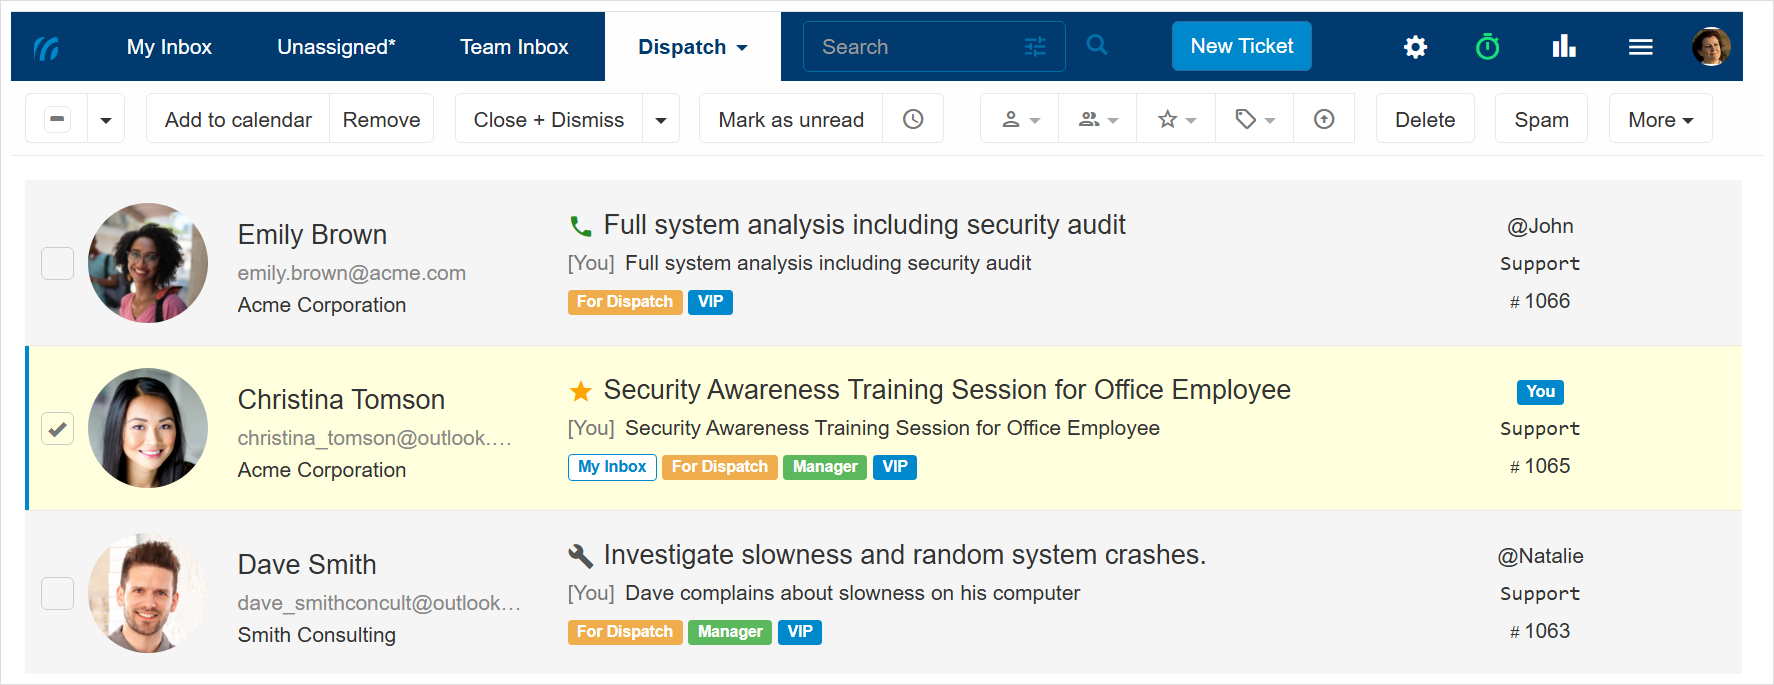
Working with the For Dispatch view
A dedicated For Dispatch view shows all tickets that have been marked for dispatch. This view makes it easy to see which tickets are pending dispatch, so you can quickly add them to Microsoft 365 or Google Calendar.
Click the More menu in the blue toolbar at the top.
- Select For dispatch.
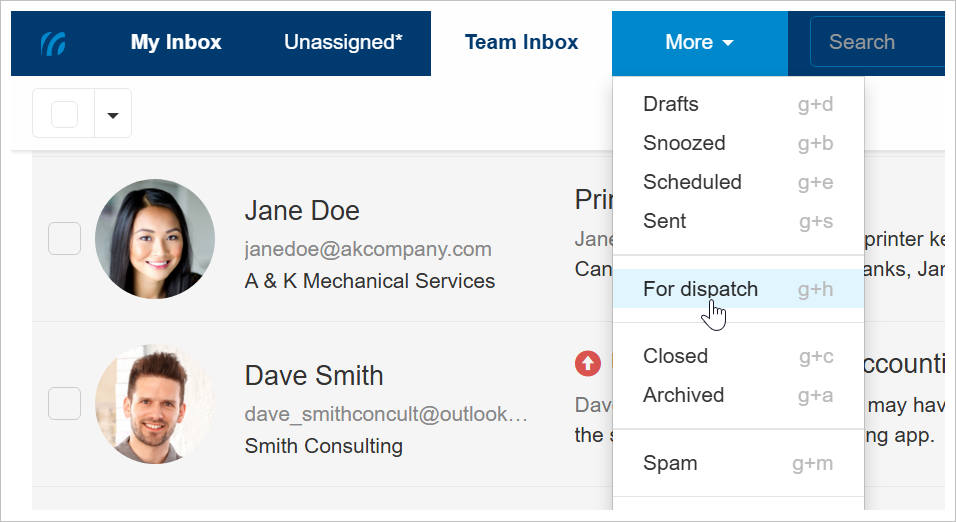
- All tickets marked for dispatch will appear in the list.
Add ticket to calendar
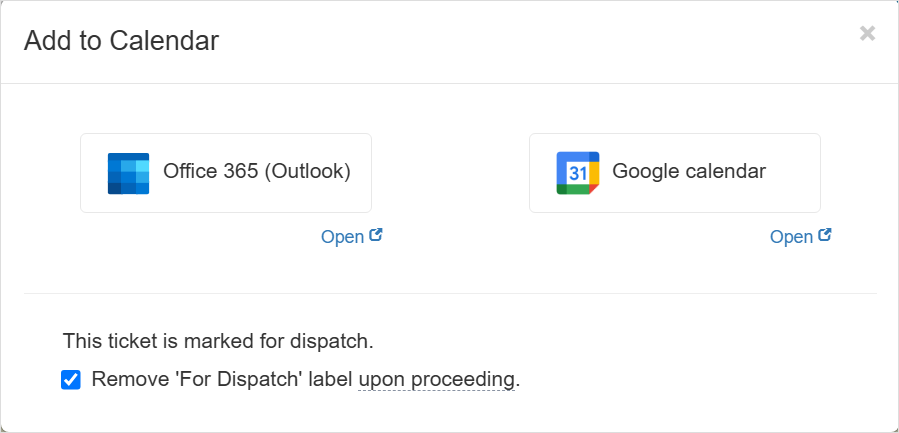
You can add a ticket to your calendar (Microsoft 365 or Google Calendar) creating an event that includes the ticket details and a link back to the ticket in your Replypad workspace.
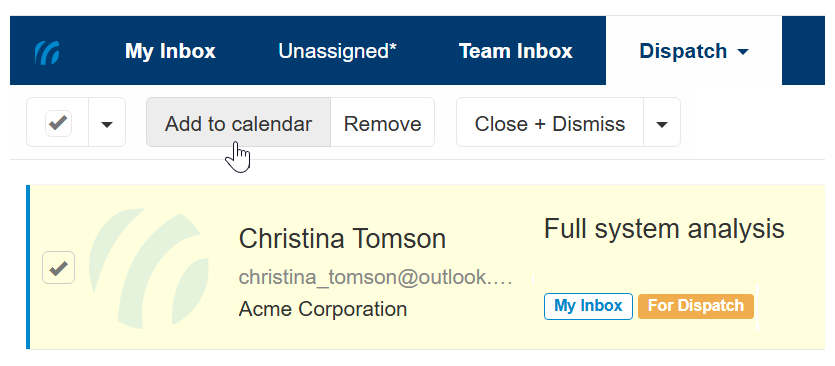
You can add a ticket to the calendar in the following ways:
From the For Dispatch list, select the ticket using the checkbox on the left, then use the Add to calendar option in the toolbar, or open the More menu and select Add to calendar.
-
From any of the tickets lists (e.g., My Inbox or Team Inbox), select the ticket using the checkbox, then open the More menu and select Add to calendar.
-
From the ticket details page window, open the More menu and select Add to calendar.
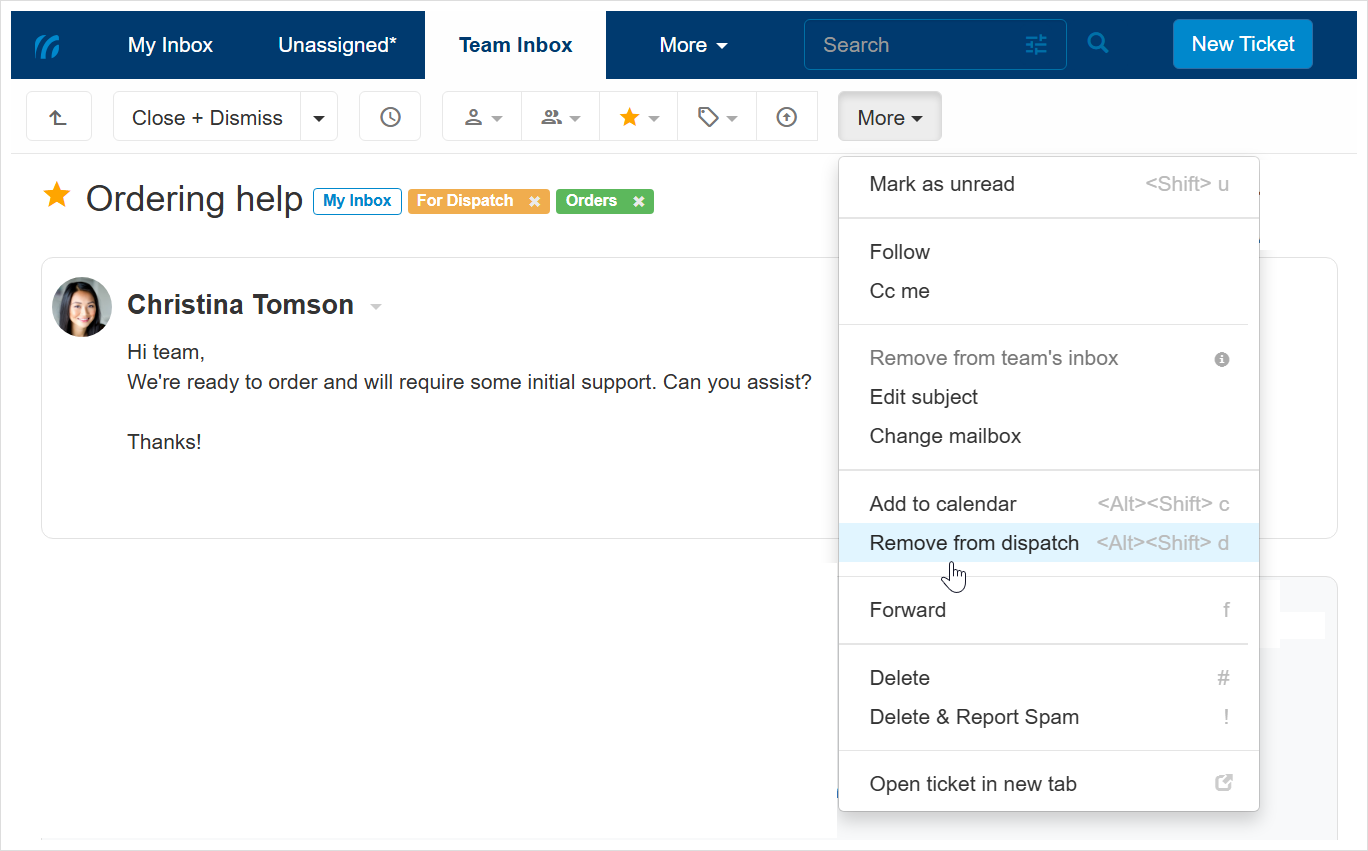
Remove ticket from dispatch
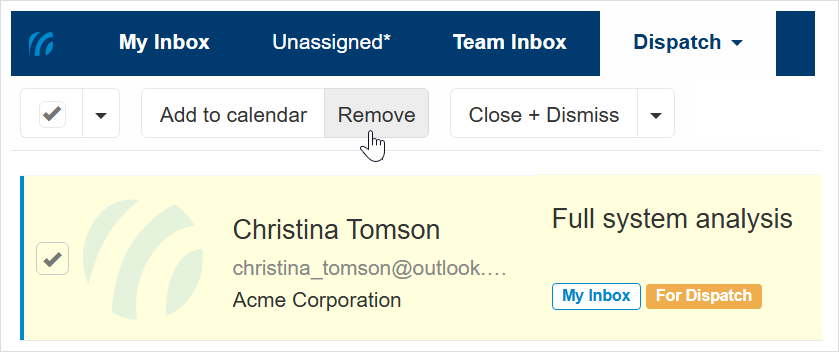
If a ticket no longer needs to appear in the For Dispatch view, you can remove it in one of the following ways:
From the For Dispatch list, select the ticket using the checkbox on the left, then use the Remove in the toolbar.
From any tickets list (e.g., My Inbox or Team Inbox), select the ticket using the checkbox, then open the More menu and select Remove from dispatch.
From the ticket details window, open the More menu and select Remove from dispatch.
Automatic removal of a ticket from dispatch
When you add a ticket marked for dispatch to Microsoft 365 Calendar (Outlook) or Google Calendar, it is automatically removed from dispatch. However, if you need to keep it flagged as For Dispatch – for example, if it needs to be dispatched to another person – simply uncheck the “Remove ‘For Dispatch’ label upon proceeding” box before adding the ticket to the calendar.